
The Frinkiac 7 is my MAME cab. What’s a MAME cab you say? It’s an arcade cabinet assembled around a computer that can run games. Typically that computer runs MAME, the Multiple Arcade Machine Emulator.
This is the third incarnation of the Frinkiac 7 that I’ve built. I think this one is very close to what I’ve always wanted in a gaming cabinet. If you’re interested in looking at the second prototype I’ve got a page here.
This version has been built out of plywood that is covered by a nice wood patterned veneer. Thanks to my buddy Mike for getting me the materials!
I rather like the form factor. I’ve never been one who wants or insists on something very “authentic” in a gaming cabinet. I certainly respect those who put lots of time and effort into restoring some rare cab, but I wanted something that looks a bit more like a piece of furniture.
The gaming cabinet was built to have swappable control panels. Currently (as of fall of 2008) I have seven different control panels built for it. What that really means is that I’ve built panels so that I can get a more-or-less authentic arcade experience for games that I really enjoyed. See below for links to articles on the different panels.
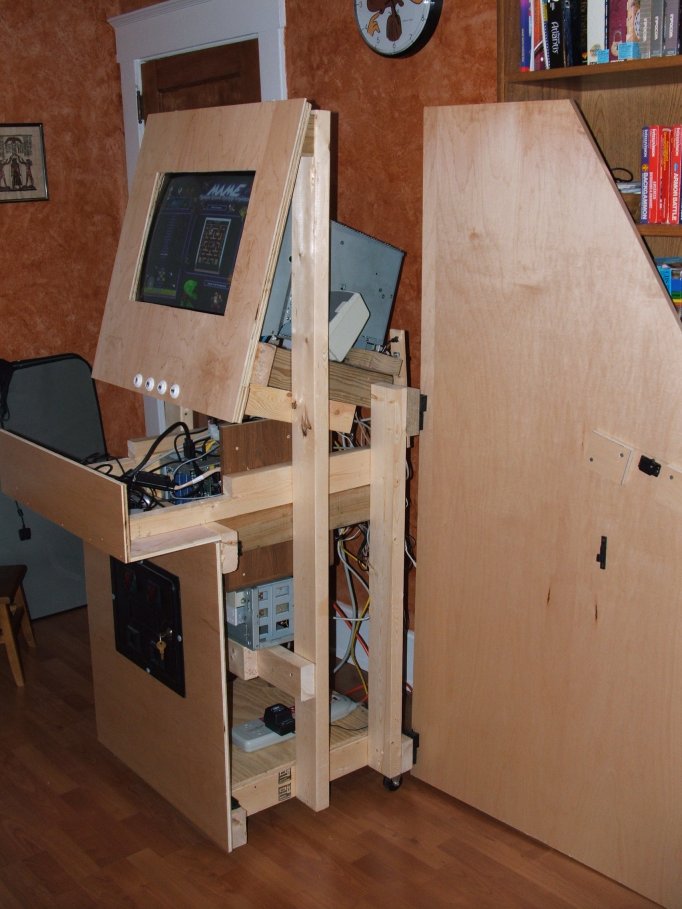
My cabinet has a couple of features that I think make it somewhat unique. The most obvious of which is that it can be mostly disassembled! The two side panels are actually on door-like hinges and can be opened (although they are locked in place when a control panel is on the machine). The hinges are very nice industrial hinges that are made such that the door (or in my case my side panels) can be lifted right off of them without any tools. I can take the sides off my machine, remove the monitor and the coin door and the remaining skeleton is quite movable with just a couple of guys (I’m talking about up and down stairways and such — the cabinet itself is on wheels and can move about a room relatively easily).
The control panels
As mentioned above, the cabinet was designed to have swappable control panels. I charted out a little pin-out specification for connecting panels to my machine, and then just wired all the panels to that pinout. Pretty simple stuff, actually.
But with multiple panels, you need a way to store them. I owe the idea for this panel holder to my buddy Darrell Sandfoss. He was thinking of a way to store his multiple panels and hit some inspiration when he saw his wife’s quilt rack. What if we made a similar rack for the control panels and just mounted them to the outside of it?

")
Since I had so many panels planned, I made my holder able to store four panels on each side. Each panel is 12″ deep, so this holder is a little over four feet tall. With storage for eight panels on the holder, plus one on the machine itself means that I can have no more than nine panels. At this point, I’ve built seven — so I can only do two more!
Here are links to blog articles about each of the different panels I’ve built:
- The 1 Player panel
- The 2 Player panel
- The Tron panel
- The Trackball panel
- The Defender/Q*Bert panel
- The Driving panel
- The Star Wars panel
Other controls

Here’s a shot of my old 1 Player panel on the second prototype cab with the ACT Labs gun. This is actually the “old version” of the gun; they have a more realistic “gun-looking” model now instead of this almost cartoony futuristic looking gun. One of my favorite games was Cheyenne, and I can play it on my cab with this gun. It also works great for more modern shoot-ems like Area 51.

Here’s a shot of a little unit called the Classic Game Controller hooked up to two Intellivision controllers. These controllers work fine, and the CGC allows them to be connected to the PC via a USB plug. This is intellivision gaming on the original controllers!
The CGC is made by Joe Fisher. He has also written a very nice Intellivision emulator called Nostalgia. He has made the CGC such that it should be possible to connect other controllers — like original Atari sticks– to the unit as well. The end user would just need to run a utility that would reprogram the unit for the new controller being supported. It’s AWESOME!
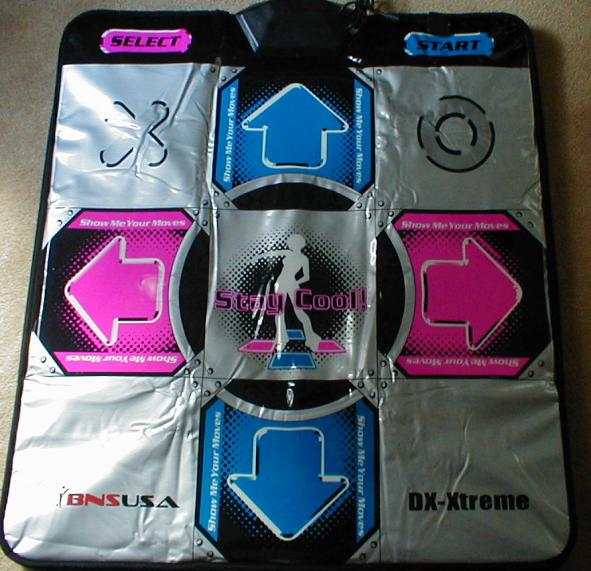
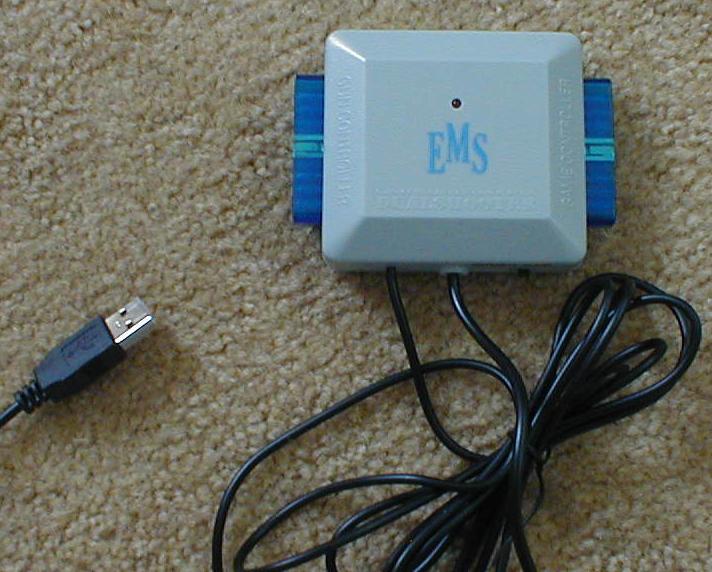
I also got myself 2 dancing pads for playing Dance Dance Revolution style games. Actually the pads are for a PlayStation 2 machine, so I had to get the little EMS converter box thingy that connects PS2 style controls to a PC via the USB port. In order to make it feel more like the arcade experience, I removed the foam padding inside the flat controllers and replaced them with 3/4″ plywood. So the pads are nice and firm and stiff. This allows me to play with my shoes on, and it doesn’t have the squishy feel that some other pads I’ve played on have.
Currently, the only game I’ve configured for use with the pad is StepMania. But so far that’s plenty to keep me going for a while. MAME has a dancing game in it at this point, I think, but I haven’t really given it much of a try yet.
Other cab stuff
I’ve only got a couple other pics to show, that may or may not be interesting.
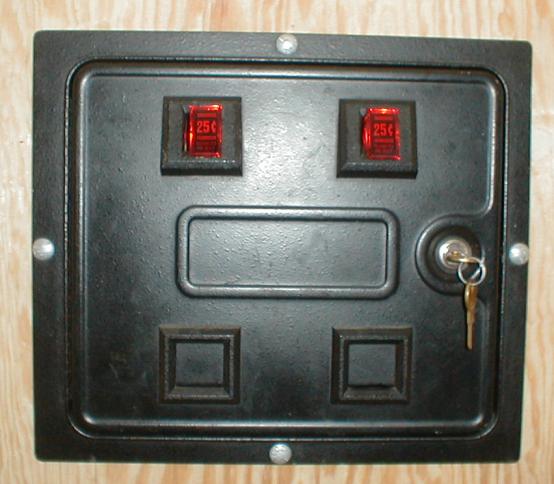
Here’s a coin door that (yes, again) I got off eBay. It doesn’t work in terms of taking coins and crediting the machine, but I don’t really want it to do that.
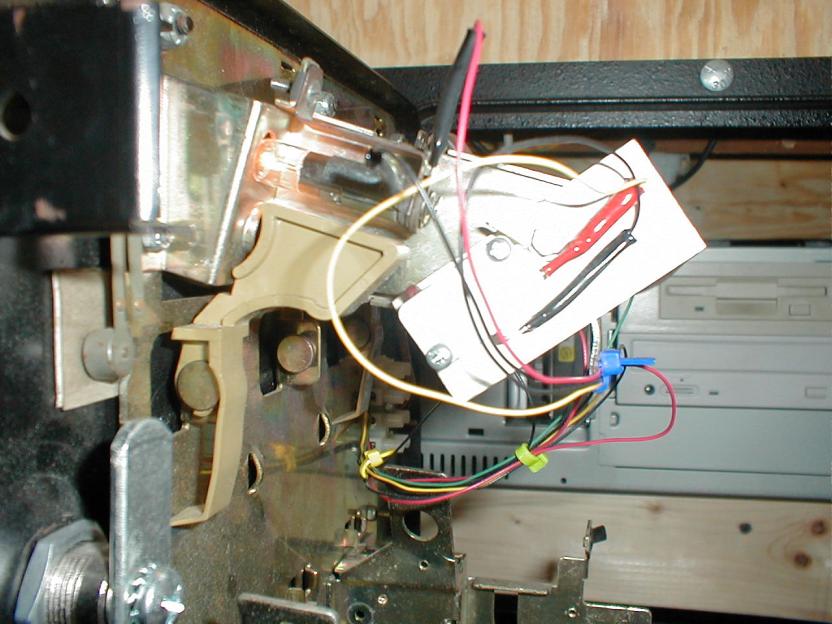
This shot shows what’s behind the coin door. I’ve rigged up microswitches right behind the coin return buttons. When you press the coin return, it credits the arcade game. It’s a really decently original feeling to reach down and “do something” besides just push a button somewhere.
Software
My cabinet runs several emulators. Each of them will be presented to the user in a front end package called
MAMEWah. This is a change from my last version of the cabinet, and because of that I don’t have everything working yet. I’ve got MAME running pretty well as well as the StepMania package (DDR clone), and I’m currently working on getting the lists and such in place so that the Nostalgia Intellivision emulator will work well.
At any rate, here’s a list of the emulation software that currently runs on my cabinet (most aren’t working within the MAMEWah front-end yet):
- MAME 0.82 (Arcade games)
- PacMAME 0.58 (Pacman variants)
- MisfitMAME 0.62 (Other arcade variants)
- MAME-z26 2.13 (Atari 2600)
- OEM2 (Odyssey2)
- Nostalgia 5.0 (Intellivision)
- VColeco (ColecoVision)
- MESS (Vectrex, Atari 5200, Atari 7800)
- Daphne (Laserdisc games)
- FCEUltra (NES)
For each of these systems, I’ve scrounged around the web and/or found kind folks who have sent me rom images for all of the games on each one. As I mentioned on an earlier page, it is such a thrill to be able to play all of the Intellivision games again!
In all, I’d estimate that the Frinkiac 7 can play something like 9000 – 12000 games. That’s a lot of gaming!
MAMEWah allows me to manipulate sub-lists of games in each of the emulator screens. For example, my wife has a set of arcade games that are her favorites (actually, they’re the games she will tolerate). So there’s a “Viv’s Games” list within the MAME screen. I’ve made various “Best of” lists for a few of the console systems, etc.
All of the game selection, etc., is handled via the arcade controls. You choose games, switch lists, switch to another emulator, etc., via the joystick and buttons. You never really need to touch a keyboard or mouse to play on the system. But, since it IS a computer inside after all, I have a wireless keyboard and mouse handy within the room.
A little history
This section is really just for me. As time slips by, I sometimes end up thinking, “Did I start this project 5 years ago? Really?”. I think I first became aware of the MAME project in 2002. I was surprised that such a thing was possible. I started reading up on Emulation vs. Simulation, etc. I got excited about reliving my memories of playing arcade games. I distinctly remember as a pre-teen (teen?) thinking that one day I would save up enough money — however much that was — to purchase a Pac-man machine.
Sometime in the spring of 2003 I decided to start researching what it would take to create a MAME cabinet. I created what I now call the “boxy prototype”. It was really just a wooden box that I could put a PC inside of, a monitor on top of, and attach a control panel to.
After a good deal of planning and experimentation on that first prototype, I designed a method whereby I could simply and quickly attach different panels to a PC via a 50-pin plug. Also during this time I was looking at various other hobbyists’ MAME cabs that they had posted on the web, looking for a good form factor on which to base my cabinet. I found an interesting looking cabinet that really looked like a wide roll-top desk. The idea that the cab could look like a piece of furniture appealed to me. I knew that my wife would tolerate it much easier in that form.
In the summer of 2003, I was laid off from my job at ANSYS. While looking for work, I started plans on prototype 2. During the Christmas holidays of 2003, I built prototype 2.
Prototype 2 sat in our dining room for a year. My wife is really a saint to put up with such goofiness on my part. She wasn’t overly happy to have that large, goofy looking plywood thing in “her dining room” all that time.
During the Christmas break of 2004, I built the current version. It has taken me over three years to rebuild all the panels that I had working on the original prototype.
 Subscribe to this blog